Sunday, May 31, 2015

Clean & Simple Sunday #18

Today's challenge is to create a clean and simple Father's Day card.

In preparing today's card for you, I discovered that I own exactly one stamp set that is appropriate for use an masculine cards and that it does not include any sentiments.  Normally when I find myself in this situation I just print something from my computer and use it, BUT and it is a big but, I had already started the card.  I'd already cut the mask, inked and blended, created a cloud stencil to use and had my train stamped and colored and fussy cut, before I went searching for a sentiment to use.

So do as I say and not as I do and gather ALL your supplies BEFORE you start your card.  Oh well, you live...you learn.   So I'll be on the hunt for the perfect sentiment stamp for my card between now and June 20th. That will give me at least a few hours to complete it before Father's Day.

Anyway, on with the card.  This is basically a one-layer card.  The only thing dimensional is the train. I stamped the train on both the card front and on another piece of white cardstock and fussy cut it out. The "extra" train is stamped in Versa Fine Black Onyx Ink and heat embossed with clear embossing powder and then I used by C3 Copic marker to color it in.  The "extra" train is a adhered with foam tape directly over the stamped image.

I can hear you...you are asking why would you stamp it on the project and then stamp and fussy cut it, just to add it on top of the already stamped image.  Well this train is very detailed and who wants to try and fussy cut all the train tracks, smoke rings, and tiny bits and pieces? Not me.  So I only cut the main image of the train and left the other parts of the stamped "flat" image add the details and dimension.  This technique is called Spotlight stamping or diecutting.


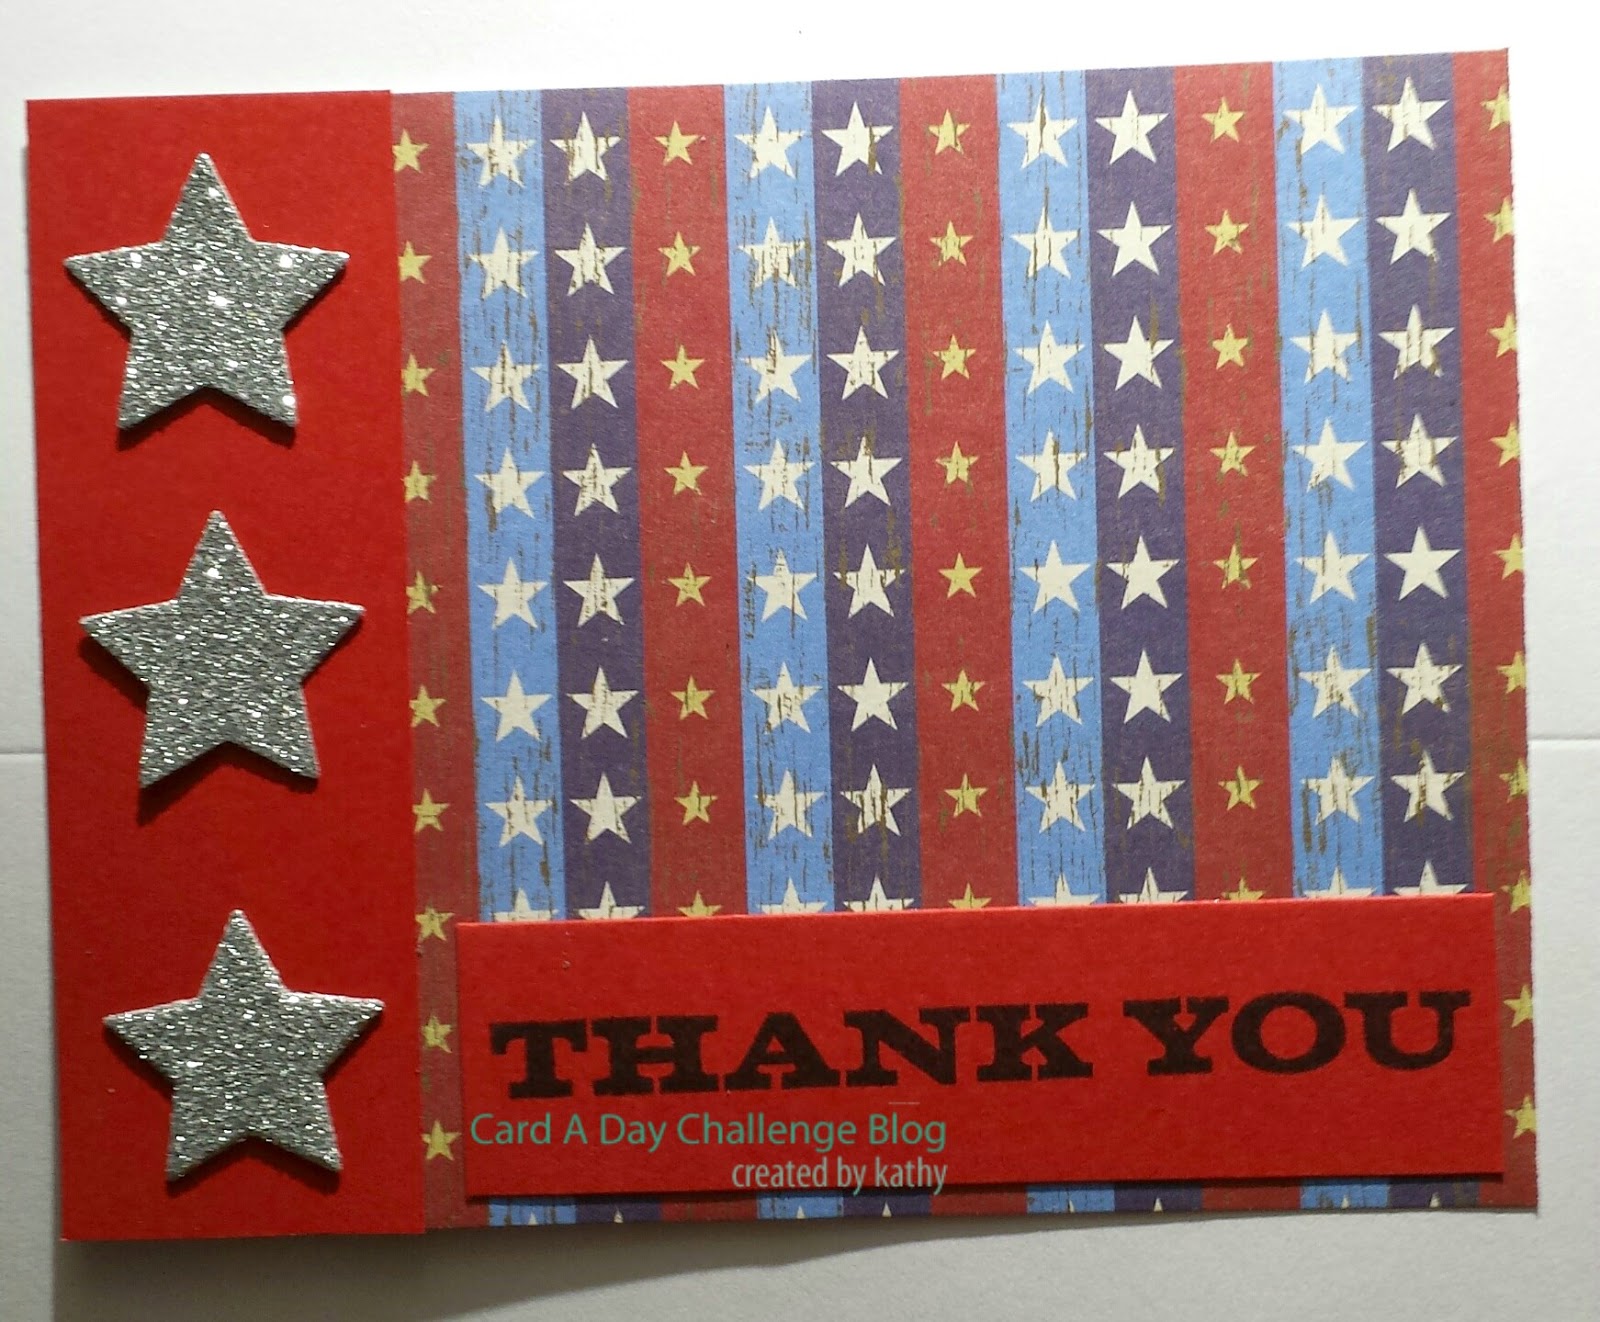
Here is Kathy's Clean and Simple card:


I used a kraft background and Stampin Up Adventure Bound DSP
and SU DS buttons in neutral for the accents.  ~ Kathy

I love how just a few simple things when used together can create such easy to create but eye-catching cards. 


Happy Crafting
Theresa

Friday, May 29, 2015

Saturday #17 Something Different ~ Blooming Flowers Blog Hop

Welcome to the 


Today's hop is sponsored by Card A Day Challenge Blog


and the prize package you could win 


To win just comment on the blogs in the hop today.  That's it! It's that simple.

We would also appreciate you following the blogs too.

Now on with the hop.

You should have arrived here from Kim's blog

Today the whole design team is playing along with the hop.  

Now as you know we try to have a challenge daily.  Today's challenge was to use flowers (for the blog hop) and to create a card using acetate.

Gracie is up first with her acetate floral card. 

Gracie used a bee hive embossing folder on her acetate and used burlap ribbon and cloth flowers to complete her bee-utiful card. :)

Here is Theresa's card:
Theresa used a card front size die to create the lattice front.  The acetate is sandwiched between two of these diecuts.
The flag is cut twice and adhered in the same spot on the front and back of the acetate piece.
The flowers and sentiment are stamped in MFT Black Hybrid Ink
Washi tape was used to edge the card front and help to adhere it to the card back. 


Next up is a sweet and simple card from Kathy:
SU Regal Rose ink with SU Blushing Bride marker on white cardstock with Martha Stewart flower stickers.
The stickers were too pretty to pass up!  ~ Kathy

Last on our post for today's hop is Denise.
I stamped and embossed on velum for the roses and sentiment, and then colored the roses and leaves with pens.  The background is embossed with the Anna Griffin folder called Poppies.  ~ Denise

Grab a piece of packaging or a an acetate sheet and get creative 
and don't forget to add a few flowers while your at it.

Thanks for stopping by today your last stop is Tristan

We hope that you enjoyed your visit today 
and that you'll become a follower of the blog and comment too. 

Happy Crafting
Theresa
Denise
Gracie
Kathy


In case you get lost along the way, today's blog line up is:

  1. Theresa Knopf http://scrapsbygracie.blogspot.com
  2. Ashley Walker http://marinewifesscrappinlife.blogspot.com
  3. Denise Soffa www.craftconfectionery.com
  4. Anna Lentz Carpenter http://agrandmaacricutandablog.blogspot.com
  5. Alicia O'Bryant http://goldengoddessdesigns.blogspot.com
  6. Created Unique Haidee http://created2bunique.blogspot.com
  7. Daphne Shreiber http://craftyscrapsofstuff.blogspot.com
  8. Sarah Pederson craftykrazed.blogspot.com
  9. Rhonda Helm http://craftingwithblue.blogspot.com
  10. Jessica Douglass Wilson www.stampinandcraftin.blogspot.com
  11. Angela Corcoran www.crazy3monkeys.blogspot.com
  12. Silvia Haynes http://sillyscrap.blogspot.com
  13. Kim Venezia www.katydidcards.com
  14. Card A Day Challenge Design Team http://cardadaychallenge.blogspot.com
  15. Tristan Dawes https://www.facebook.com/TinstarDesigns


Anything Goes Friday #17 Guest Designer Tristan Dawes from Tinstar Designs

Today's guest designer is my StampNation friend Tristan Dawes.

Hi. My name is Tristan and I live in the hilly leafy suburb of Eltham North in Victoria Australia. I’ve been married for just over 7 years now to my best friend (we’ve been together nearly 18 years) and we have a beautiful 8 year old daughter fondly referred to as Miss K.

I work full time which is a juggle with family life but that’s the way it is for the moment (I am dreaming of part time in the future). I’ve been working for the largest insurance company in Australia for the past 4.5 years as an instructional designer - what’s that I hear you say? Basically I write training programs for face to face, online, virtual classrooms, leader led and self-paced delivery. It’s a fun job and allows for me to be a little bit creative at work too.

I’ve been paper crafting for about 10 years now, but have really come into my own since joining an online community called Stamp Nation. I think I’m finding my style which leans towards CAS and as many of you know I’m a bit of a shop-a-holic and find it hard to not jump on board with new trends.


If you would like to see more from Tristan please follow her Facebook page Tinstar Designs.

Please hop with us tomorrow for the Blooming Flowers Blog Hop


and you'll get to see more from Tristan as she'll be joining us for the hop. 

Happy Crafting
Theresa & Tristan


Thursday, May 28, 2015

Thursday Technique #17

Today's technique challenge is glitter diecuts.

Here is a video from Jennifer McGuire that shows one way to create these.

Here is Kathy's cards:


This first card not only has inlaid glitter star diecuts but a great glittery gold background.

This patriotic card also includes glittered star diecuts. 


Here's Theresa's cards:

I used outline stickers on adhesive sheets and applied micro fine clear iridescent glitter and burnished it into the adhesive.
Use a piece of Swiffer cloth to clean up afterwards.
I then colored the glitter using my Copic Markers.  The tie is then adhered to a piece of white
cardstock and fussy cut out since the adhesive and glitter are see through.

For this one, anything outlined in black is a outline sticker glittered and fussy  cut out.
I used Ranger Distress Inks to create the background. 


Wednesday, May 27, 2015

Card Sketch Wednesday #17

Today's challenge is to use the following sketch to create a card.


Here is Denise's take on the sketch:

 I have had these fun brads for a little while and used this sketch as an opportunity to use them.  I think you could use this for anyone who liked the outdoors.  The patterned paper is from a 6 x 6 pad called Lakeside by Pebbles.  ~ Denise

Great masculine card, don't you think?

Here is Theresa's take on the sketch:


Happy Crafting
Theresa & Denise


Tuesday, May 26, 2015

Color Challenge Tuesday #17

 Today's color challenge is a more muted pallet than we used in the last few weeks.

Gracie did an amazing card with this color challenge. So pretty and an easel card too.

I used some lovely Martha Stewart butterflies my daughter gave me for Mothers' Day! ~ Gracie


Happy Crafting
Theresa & Gracie

Monday, May 25, 2015

Mistletoe Monday #17


Happy Memorial Day! 

May your day be filled with love and remembrance
of those who sacrificed everything that we should be free and safe.  


Today's challenge is to create a holiday card that uses Ribbon or Twine.

Here is Kathy's take on the challenge:

All supplies were from  Michael's  and Hobby Lobby.  Iridescent  vellum over Christmas  paper with red and  green  circles.  ~ Kathy

Here is Theresa's card:


Pull out that stash of ribbon and make a card.

Happy Crafting
Theresa & Kathy


Sunday, May 24, 2015

Clean & Simple Sunday #17

Welcome to Clean and Simple Sunday.

Denise has a very simple card for us today that just screams summer.

If you are going to do a simple card, embossing it can really make it stand out.  I tried something new for mine by inking one side of the embossing folder with white ink before embossing the yellow paper.  It did make the yellow of the lemons stand out a little more and put a subtle pattern on the rest of the yellow, which shows up more in person than the picture shows.  Next time, I might try applying the ink with a brayer and see what happens.  ~ Denise


My clean and simple today uses embossed foil paper from a paper stack by Hobby Lobby.
It also features a napkin layer.  I took the napkin apart so that it only had the colored layer and applied that to a piece of white cardstock that I had run through my Xyron 5" sticker maker.  I then stamped on the sentiment with VersaFine Black Onyx Ink and after the ink was dry applied Mod Podge to the entire front of the piece.  I allowed this to dry completely before attaching to the card.   ~ Theresa

Go make a clean and simple card today.  Have fun with it.  Try a new technique.  Ink your embossing folders or play with a napkin.

Happy Crafting
Theresa & Denise

Saturday, May 23, 2015

Specialty Cards Saturday #16

Today's challenge is to create a shaker card.

Here is a couple of video links to help you out if this is a new technique for you:


Here is my card for you:

This is the shaker card as I originally created it, but I didn't like it. Way to plain.
Liked the concept in my mind but not the execution.  So I tore off the top layer and started over...
and this is the card I ended up with.  Better? Yes I think so.
Still not great but shaker cards are a real challenge for me.  

Here's Kathy's card for the challenge:

I  used a Tim Holtz Alterations die for the window.  I used discarded hard plastic from a toy  to make the window glass.  The paper and flowers are Hobby Lobvy supplies.  My one hint is to get foam tape rather than  dots or squares when using foam for raising the window. ~ Kathy


Isn't Kathy's card awesome? I love it, so simple and yet so pretty.

Make a shaker card or a shaker element for your scrapbook pages.

Happy Crafting
Theresa & Kathy

Friday, May 22, 2015

Anything Goes Friday #16 Guest Designer Sharon Salerno

Today's guest designer is Sharon Salerno.


I am Sharon Salerno and I have been stamping for about 2 1/2 years.  I am a member of StampNation and have learned so much from Catherine and the wonderful Design Team and the awesome members.
When I started making cards I was a full time caretaker for my husband who had dementia, so it was therapy for me and even though he passed away this past October I continue to stamp for therapy.


Thank you so much Sharon! What a beautiful sympathy card.  The colors are bright but soothing.

Go create something wonderful today. 

Happy Crafting
Theresa

Thursday, May 21, 2015

Thursday Technique #16

Today's challenge is second generation stamping.

Denise created this wonderful card, using second, third and fourth generation stamping.

On the stamping card, I actually used the same inking on each
 stamp four times to give it a ombre effect. ~ Denise

Have you tried second generation stamping?

Here is a great video by Catherine Pooler on how to achieve this technique.


Happy Crafting
Theresa & Denise

Wednesday, May 20, 2015

Card Sketch Wednesday #16


Today's card sketch challenge:


Here's Gracie's take on the sketch:


I'm loving all that patterned paper!

Here's my take on the sketch:

I used my Deco Foil for the first time on this card.  Note to self: Add the foil layer
to a piece of cardstock before adhering to card (see the line where the foil overlays the green strip?).
I used the sentiment as the block on the sketch and added a few gems since I went with a plain card base.
Give this sketch a try.

Happy Crafting
Theresa & Gracie

Tuesday, May 19, 2015

Color Challenge Tuesday #16

Today's color challenge:


Here is Kathy's take on the challenge.
I like she incorporated the angle trend in the card too.
I'm really liking the big graphic flowers that are out right now. 
They make such a bold statement.

Here is my take on the color challenge:

I used a napkin to create this card.  I loved the tie dye napkin and it had all the colors in the challenge + yellow. I adhered the single colored layer of the napkin to a white piece of cardstock which I had run through my Xyron 5" sticker maker.  I stamped my sentiment in VersaFine Black Onyx Ink.  I then used Glossy Mod Podge to coat the napkin.  

I was able to make 4 of these card fronts with one napkin.


Give this one a try.  Lots of ways to interpret this color challenge.

Happy Crafting
Theresa & Kathy


Monday, May 18, 2015

Mistletoe Monday #16

Today's Mistletoe Monday challenge is to create a card with a moose or reindeer.

Here's my take on the challenge:

My card features the adorable moose and sentiment from Paper Smooches Chubby Chums Pals stamp set.
The background is from a holiday mat stack.  The moose is stamped with Stampin' Up Chocolate Chip and colored with Copic markers.  He is covered with Wink of Stella Clear Glitter Brush Pen.  The sentiment is Memento Lady Bug Ink.


Here's Denise's take on the challenge:

I cut the reindeer card with my Cricut using a cartridge called "Winter Woodland".  The "Merry Christmas" sentiment was from a cartridge called "Artbooking".  I used silver vinyl for the reindeer and sentiment then put bling on the antlers to make them pop a little.  ~ Denise


Happy Crafting
Theresa & Denise

Sunday, May 17, 2015

Clean & Simple Sunday #16

For today's Clean and Simple masculine card challenge I've created a couple of cards that use foil.

Although the sentiment isn't exactly the most masculine, you could easily adapt these cards to be more masculine using a different sentiment or by adding a truck or car image instead of a sentiment.

This one uses a cover a card die by Paper Smooches in a square lattice pattern over the embossed
foil cardstock layer.  The sentiment is embossed with pearl embossing powder and the tag is spritzed
with glimmer mist.

Letting the embossed foil stand on it own on this card. Tag is created the same as above.

Gracie created this great card for us:


Definitely manly.  

Go create your own clean and simple masculine card.

Happy Crafting
Theresa & Gracie


Saturday, May 16, 2015

Specialty Cards Saturday #15

Today's specialty card is the Iris fold card.

Denise took on this challenge and blew me away with her amazing work.

From Denise: This was my first time doing an Iris Fold technique.  According to what I found, it is because it resembles the closing action of an iris on a camera.  I made a cut for a hummingbird on my Cricut.  The template for the inside I found on www.handcraftedgreetings.com.  They had templates for different shapes, but I decided that the triangle best fit the cutout shape.  I followed the first instructions that called for folding strips of paper, but I used card stock and it ended up much too thick for a card.  I took it all apart, cut the strips in half lengthwise and used single layers instead of folded layers. I used regular cardstock giving it a shimmer by using silver Viva Decor 3D Stamp Paint.  When it was assembled, I went to stamp on the sentiment and had ink on my hand, so I smudged the blue paper.  I distressed the paper to cover up the smudge.  I did use foam dots to attach it to the card since the layers of paper underneath made it thick and it would not lie properly on the card. It was a different technique and next time I think I will try it with patterned paper to give it a different look.


There are lots of tutorials on YouTube for this technique and hundreds of free patterns on Pinterest, just search Iris Fold.

Happy Crafting
Theresa & Denise

Friday, May 15, 2015

Anything Goes Friday #15 Guest Designer Carey Payette

Today's Guest Designer is Carey Payette.


A little about Carey:

I am a wife and mom to 3 very busy boys. I am a Canadian, living in a suburb of Columbus, Ohio since Y2K. By day I am a software developer, and by night I am a guitar student and black belt in Taekwondo. I am lucky that my boys and I get to enjoy music lessons and the martial arts together.

I've always had a crafty streak although I am at both ends of the spectrum. I love to create using nothing but my hands, scissors, stamps and inks, but at the same time I'm a total electronics geek and love playing around with the latest in microcontrollers and sensors and dabble in home automation. I've been paper crafting for almost 12 years, it is definitely my creative outlet and is very therapeutic. I love making cards and preserving memories through scrapbooking whenever I get the chance (which isn't very often, so I make it count!!)


It’s Friday and it’s time for an Anything Goes challenge! This week’s challenge is to use a stamp set in a way that it was not intended. In this example, a feather stamp was used to create a palm tree.

The stamp set used in this card is Four Feathers from Stampin’ Up!. One of the feather images was stamped multiple times using the MISTI and colored in with Copic markers. The trunk was drawn in lightly with pencil then traced over with a Copic Multiliner and then colored as well. These areas were masked with Post-It Tape and the background was created using a variety of Distress inks and accented with a white uniball signo pen.

The card was finished up using Simon Says Stamp Stitched Rectangle dies along with Night of Navy and Peach Parfait Stampin’ Up! Cardstock. The sentiment is from Hero Arts Everyday Sayings and stamped in Night of Navy ink.
Hope you have fun with this challenge!

Full materials list:
Neenah 110# Solar White card base
Neenah 80# Solar White for the stamping panel and mat
SU! Night of Navy card stock mat
SU! Peach Parfait card stock mat
SU! Soft Suede card stock (coconuts)
Simon Says Stamp Stitched Rectangle Dies
SU! Owl punch for the coconuts
SU! Night of Navy Ink
Ranger Distress Broken China
Ranger Distress Weathered Wood
Ranger Distress Chipped Sapphire
Ranger Distress Mustard Seed
Ranger Distress Spun Sugar
Ranger Distress Spiced Marmalade
Copic Hex Chart (Sandy Allnock)
Copic YG06
Copic YG03
Copic G14
Copic E15
Copic E35
Copic E37
0.3 Copic Multiliner
Unibal Signo White Gel Marker
SU! Four Feathers Stamp Set
Hero Arts Everyday Sayings Stamp Set
Post-It tape for masking
MISTI

Thanks Carey for your incredible card and another great use for those wonderfully popular feather stamps and diecuts.

Get creative today and think outside the box and use a stamp or diecut in a way that it was intended.

Happy Crafting
Theresa & Carey

Thursday, May 14, 2015

Thursday Technique #15

Today's technique challenge is use the Chalkboard technique.

Gracie brings us this great example:


Happy Crafting
Theresa & Gracie

Wednesday, May 13, 2015

Card Sketch Wednesday #15


Today's sketch is from Deconstructing Jen.


Here is Kathy's take on the sketch:


I just love the bright colors Kathy used.

Happy Crafting
Theresa & Kathy